The role of project management often falls to people who did not set out to be project managers. These people are hard-working, organized, and simply good at their jobs.
It’s sometimes quite a leap to go from scheduling your own work to scheduling everything for an entire project, but it doesn’t have to be overwhelming to know about project management and how the project schedule is done.
What is scheduling in project management?
As you might imagine, a project schedule contains more than your average weekly planner notes. Project scheduling involves creating a document, these days usually a digital document, that details the project timeline and the organizational resources required to complete each task.
The project schedule must be accessible to every team member. Its purpose is to communicate critical information to the team, so it must be comprehensive and easy to understand.
How is project scheduling different from planning?
Quite often, these two terms are used interchangeably but they have different roles in the successful completion of a project. On a higher level, the project plan is the master blueprint while the project schedule details the specific tasks.
- Project planning primarily involves selecting the appropriate policies, project methodologies, and procedures required to deliver the project on time.
- Project scheduling, on the other hand, converts the plans, scope, and cost into an operational timeline.
Why should I create a project schedule?
Project scheduling is important since it plays an effective role in project success. The following are some of the advantages if you properly create your project schedule.
- Project scheduling, when done well, makes the entire project run more smoothly.
- Committing to the project scheduling process at the beginning of your project will give you a clear picture of the requirements set before you.
- It also gives you the chance to catch issues early and alert clients if a timeline isn’t feasible. Besides being good for you as the project manager, project scheduling is good for managing project teams.
- Everyone knows what to expect and when. Everyone is being held accountable for the same due dates.
- Other managers can allocate resources efficiently for your project, and they’ll be able to anticipate when resources will be available for other projects.
What are the steps in the project scheduling process?
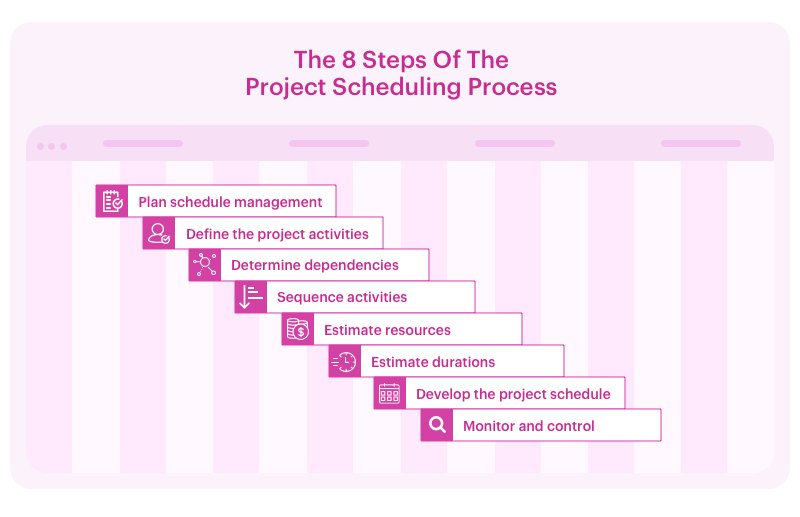
How do you create a project schedule? Well, the project scheduling process can be broken down into eight manageable steps. Follow these and pretty soon you’ll be a scheduling pro.

1. Plan schedule management
The groundwork for a good project schedule is to establish the procedures, company policies, and documentation guidelines that will govern your project. The plan for schedule management outlines resources available for the project and the contingencies that may arise.
It also lists project stakeholders, itemizes individuals who must approve the schedule, and lists others who need to receive a copy.
This document also establishes who has the authority to make schedule changes, the process team members should follow in order to request a change, and a project communication plan to alert the team of changes made during the course of the project.
2. Define the project activities
This can be as simple as creating a list of tasks that must be completed in order to deliver your project. In the case of complex projects, it may be helpful to organize these tasks in the form of at, a chart visualizing project tasks and their sub-tasks and to stay organized at work.
One challenge in this part of the project scheduling process is knowing how to divide activities. Consider the 8/80 rule, which states that a single activity should take between eight and eighty work hours.
In team task management, tasks requiring fewer than eight hours could be grouped with others and tasks over eighty hours are likely too cumbersome and should be broken down further. Activities should also be measurable, easily estimated, and related to both a project deliverable and a budgeted cost.
Simplify project scheduling with workflow software that automates task timelines and keeps your team on track.
3. Determine dependencies
Once you have all the project activities listed, think through each one carefully to identify which tasks rely on others to be completed. If you’re building a house, for example, you can’t put the roof on until the frame is completed. It’s important to correctly define all your project dependencies so you can schedule accurately and avoid project delays.
You can use the best project management software to tackle project task dependencies by engaging with stakeholders, brainstorming constraints related to dependencies.
4. Sequence activities
After you’ve established dependencies among your activities, you can sequence them. At this point, you aren’t assigning any time to your activities in terms of work hours or due dates. Instead, you’re focusing on the order in which all project activities should be done so that the most efficient flow is created.
5. Estimate resources
Each activity in your project will require resources in the form of personnel, subcontractor costs, tools (physical and/or digital tools like software programs), and workspace. Make sure to consider other resources that are specific to your industry or project. Estimate the resources needed for each project activity.
Remember that resource allocation will affect your schedule; if the same team member is responsible for multiple project tasks, they can’t be completed at the same time.
Discover how Kissflow's low-code platform
6. Estimate durations
This step is pretty obvious but very important. How long will each project activity take? Underestimating will, of course, put you behind schedule and ultimately frustrate your customer.
Overestimating could leave team members or other resources sitting idle as they wait for antecedent tasks to be completed. The best way to estimate duration is to use data from similar previous jobs.
If you don’t have any data to work from and there’s no industry standard to which you can refer, an estimate based on the average of the best, worst, and most likely scenarios.
7. Develop the project schedule
At this point, you should have all the information you need to develop your project schedule. Taking into consideration the duration and resource requirements of each activity, as well as their dependencies and proper sequence, you can assign start dates and due dates for each activity.
There are multiple models and formulas for developing the project schedule, including critical path, critical chain, and resource leveling among others. Each of those methods is worthy of an article in itself, so we won’t cover them here. Take the time to find a method that works well for you.
For example, Don’t ignore the calendar! Check vacation requests from team members. Don’t forget to include factors like national holidays, corporate functions, stakeholder events, and other occasions that may affect your schedule. If the whole company shuts down for a holiday week, you’ll need to add that time to your due dates and manage customer expectations accordingly.
8. Monitor and control
Unlike the rest of the project scheduling steps, Step 8 is ongoing. As a project manager, you’ll be monitoring and controlling your project schedule for the duration of the project. This step involves running project reports and assessing the progress of a project against the schedule, managing performance, and communicating with the team.
When schedule changes must be made, you ensure they are carried out and communicated according to the plan laid out in Step 1. Throughout the project, you will ensure that each activity is on schedule and determine whether corrective action needs to be taken if delays occur.

Want to learn project management but put off by jargon?
Learn what's important in the simplest ebook for non-project managers.
Download NowProject scheduling techniques – 3 main types
There are several project scheduling techniques that can help you break down your project into small, manageable tasks. Some of these techniques include
- Task lists
- Gantt charts and
- Calendars
1. Task lists
This is the simplest scheduling technique and works for small projects without a lot of interdependencies. However, for larger projects, it may not be the right choice as tracking the progress can become a major challenge.
The task list contains the list of tasks and subtasks along with the team members assigned to do them. An online project management software can come in handy when you’re using task lists.
Learn more: Workflow Scheduling vs Task Scheduling
2. Calendar
The calendar can be used to depict the project timelines of all the tasks throughout the course of the project. It’s a decent approach to view overlaps between activities. But, this approach suffers from an inability to assign tasks and view dependencies.
3. Gantt charts
A Gantt chart is the most common tool used by project managers to visualize the timelines and dependencies in a project. You can get a quick estimate of the time required to complete every task.
The chart shows all the tasks, represented by bars, when they’re set to start and end, how long each task will last, task dependencies, and where there are overlaps.
-> Drag & Drop Low Code Platform - Schedule a Demo Today
Getting the right project scheduling software with Kissflow Project
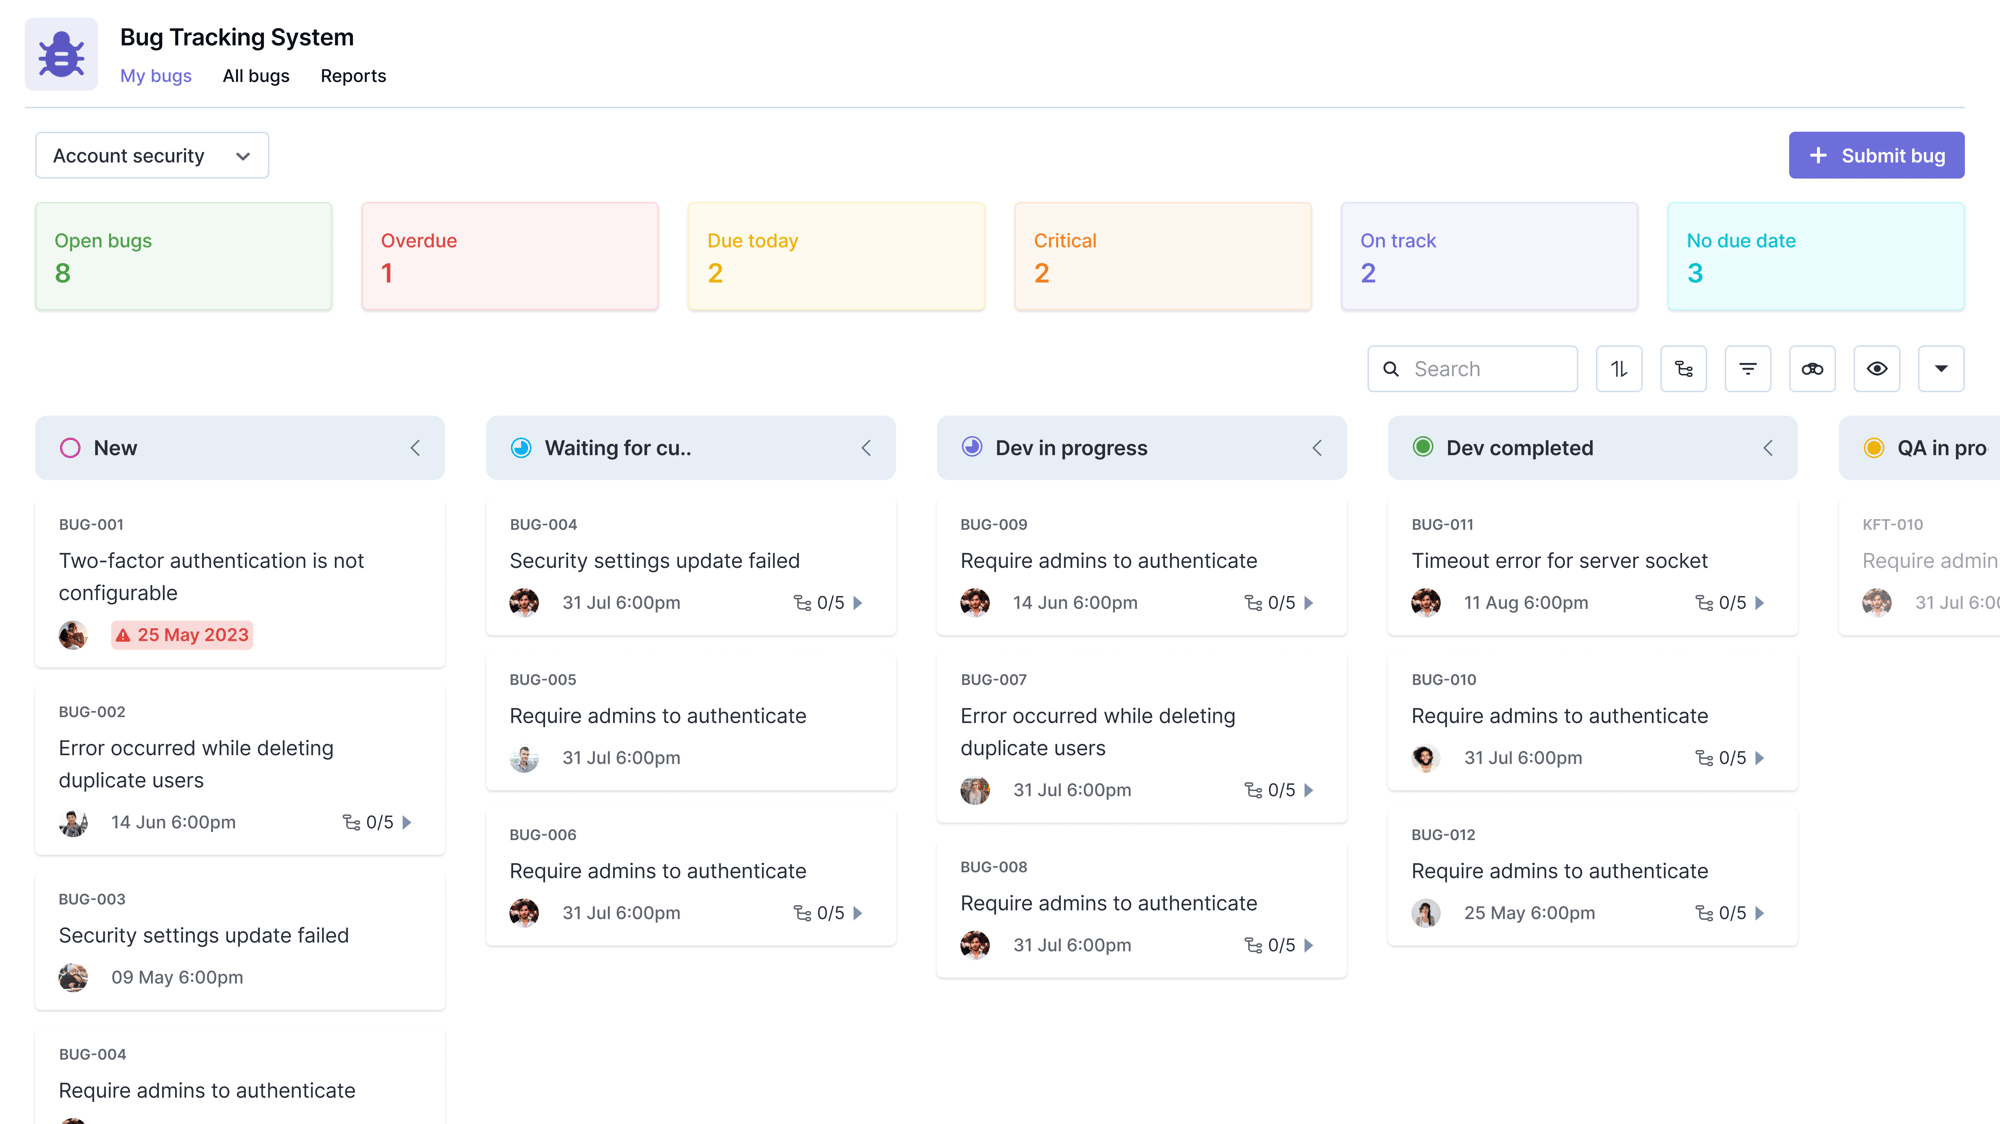
It’s important to have the best project management software to help you get organized and stay that way. With Kissflow Project, you get a digital workspace that’s designed to give you and your team the project scheduling tools you need to stay on schedule. Intuitive kanban boards give everyone a helpful visual of project progress, and automated alerts keep everyone in the loop on approaching deadlines.
Start using Kissflow Project for free and see how it can help you master the project scheduling process.
Find out more about the benefits of the Kissflow Low-Code Development platform.
Your search for Project Management has landed you here. Wondering why?
As a user, you'll experience the full value of Kissflow by implementing it across departments for diverse use cases rather than just addressing isolated needs like a project management tool for a single team or department.
Application Development Platform
Digital Transformation Platform
In today’s digital era, Business Owners and Managers must embrace automation to stay competitive. A no-code platform enables seamless digital transformation. Learn how Kissflow supports business users.

%20(2).png?width=2000&name=PSE%20Dashboard%20(3)%20(2).png)
.png?width=2000&name=Dashboard%20(5).png)


